Day 11
~
Tissue Paper Photo Transfers

This is a very popular pin on Pinterest that looked fun so I tested it out. First let me say it took me 7 tries to get this correct. I will tell you all my tweaks and hope you will be more successful. I did finally get a good print and it is gorgeous so lets begin :)
Original Post on Pinterest

http://pinterest.com/pin/267119821620493736/
WHAT YOU WILL NEED
~tissue paper (good tissue paper, I began with $ store tissue paper and it did't work so stick to the good stuff, a bit thicker)
~Mod Podge
~Canvas ~ I bought and 8' x 10' canvas from the $ store
~paint brush
~iron
~card stock or thick photo paper
~tape
~scissors

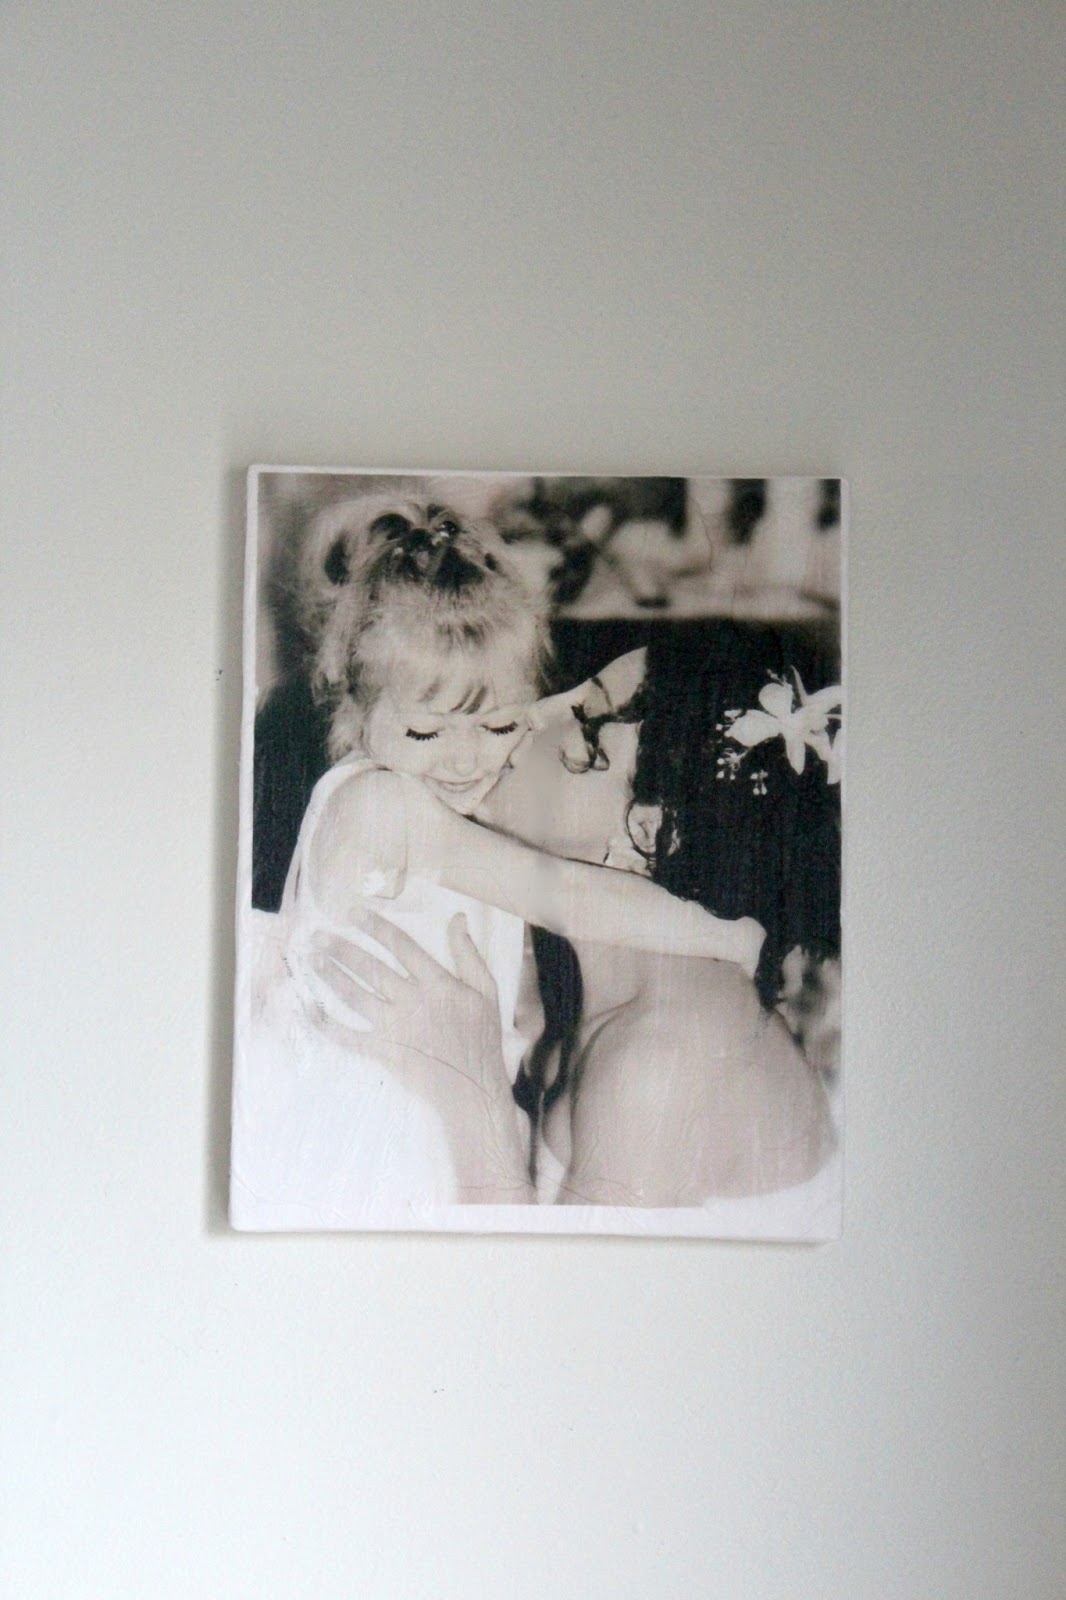
Begin by choosing a photo and printing it out on a thick card stock or photo paper that is thick .. I chose one of my favorites pictures .. my daughter and I on my wedding day ...

get your tissue paper

cut your tissue paper a bit larger then your photo paper ..

** my tweak ** after the 5th go I decided to iron the tissue paper . on low .. the creases kept picking up excess ink ...

YIKES!
wrap your paper like a gift .. folding the excess paper onto the back of your card stock and tape it securely, try to keep your paper as taught as possible .. this is very important .. if your photo paper is loose your photo will not print properly. Secure all the edges in the back so that no stray paper gets stuck in the printer.

Print *** my tweaks *** set your print to 'fast draft' ... also set your print option to 'light' or 'less ink' ... 7th try after tweak , tweak, tweaking ... success :)


spread a light layer of Mod Podge on your canvas (notice my DIY rainbow ombre nails .. Day 6 ... tee hee)


Apply your tissue paper to your canvas .... ** my tweak *** I eventually laid my tissue paper flat on a table and put the canvas on top of the tissue paper ... pressing down on the back of the canvas with my finger in circular motions .. the reason for this .. when I applied the paper originally and pressed from the front with my fingers (trying to get the wrinkles and the bubbles out .. I ripped the paper .. again ... and ... again ..

Trim your edges ... and ... wa laaaa ..

Verdict ... TRICKY!!! drove me nuts .. took me 7 tries .. and that is ALOT of time ..
** tweaks **
1. use a thick card stock not thin printer paper to tape your tissue paper to
2. tape the tissue paper as taught as possible avoiding loose paper.
3. iron the tissue paper .. (crazy but necessary I ironed the paper before I taped it onto the card stock and the again when it was attached to the card stock
4. set your printer to fast draft ...
5. set your printer to use less ink .. this option is found in setting when you print your photo .. Im sure the options and wording are different for every printer so i can not e too specific but on my printer I set it to 'color' 'custom' 'lighter' .. basically whatever setting you can find to use less ink ..
6. lay the tissue paper flat and the mod podged canvas on top of the tissue paper so that you can press down on it from the back .. if you try to get the wrinkles and bubbles out by pressing on the front of the photo the delicate tissue paper will rip .. OY!
ok .. so it was a pain in my can - can, but the finale product is gorgeous .. the thin paper let you see the texture of the canvas ... It really is gorgeous so if you have the ink and the patience give it a go .. hopefully my tweaks will save you some time and ink :)
Id love to hear how it went for you and if you have any ideas on how to make the results more reliable
Thank you for all your tweaks!! Definitely saved me my sanity! I had a couple tweaks of my own- instead of fast draft, which produced lines through the image, I went to the paper/quality setting- switched the paper to "other specialty paper" setting, kept the quality at normal, switched the color to grayscale, and adjusted the ink to a tick below half. Printed beautifully! Also, applied a very THIN later of modge podge (used paper towel to wipe off most of it). Then once the image was on, I let it sit for 5 minutes then applied a layer of modge podge- to the entire image. Let sit for half hour- then applied smother later of modge podge. End result was Gorgeous! Couldn't have achieved this result without your blog- probably would have given up! Thank you and please keep posting!!
ReplyDeleteThanks for the tips and the kind words. This project definitely took me a long time (lots of retrys) but the end results were worth it. I'll try the tips you mentioned, sounds great! I want to make a few of these as gifts soon so hopefully with both of our tweaks it will be smooth sailing. :)
ReplyDeleteHi,
ReplyDeleteThanks for share this information... helped me a lot...
tissue paper suppliers in chennai