Showing posts with label diet. Show all posts

Sunday, February 24, 2013

365 Days of Pinterest Day 17 Baked French Toast with brown Sugar Sauce


Baked French Toast with Brown Sugar sauce ..... MMMMMMM!!


Day 17 of my 365 Days of Pinterest and its a Thumbs up to this pin .. 
I tweaked the original recipe alot .. so read on ... 


INGREDIENTS

1cup melted butter
2 cups of brown sugar
 Texas Toast  or any thick bread (10 slices)
4 Eggs
1 1/2 cup milk
1 tsp Vanilla
Powdered sugar for sprinkling

2 ~ 9 x 13 pans

pre heat oven at 350 


Melt butter in microwave and add brown sugar .. mix 


I discovered my ikea mixing bowl was not microwavable .. mehhh ... throw out mixture, begin again :) 


Pour butter sugar mix into pans


spread


Beat Eggs Milk and Vanilla


.


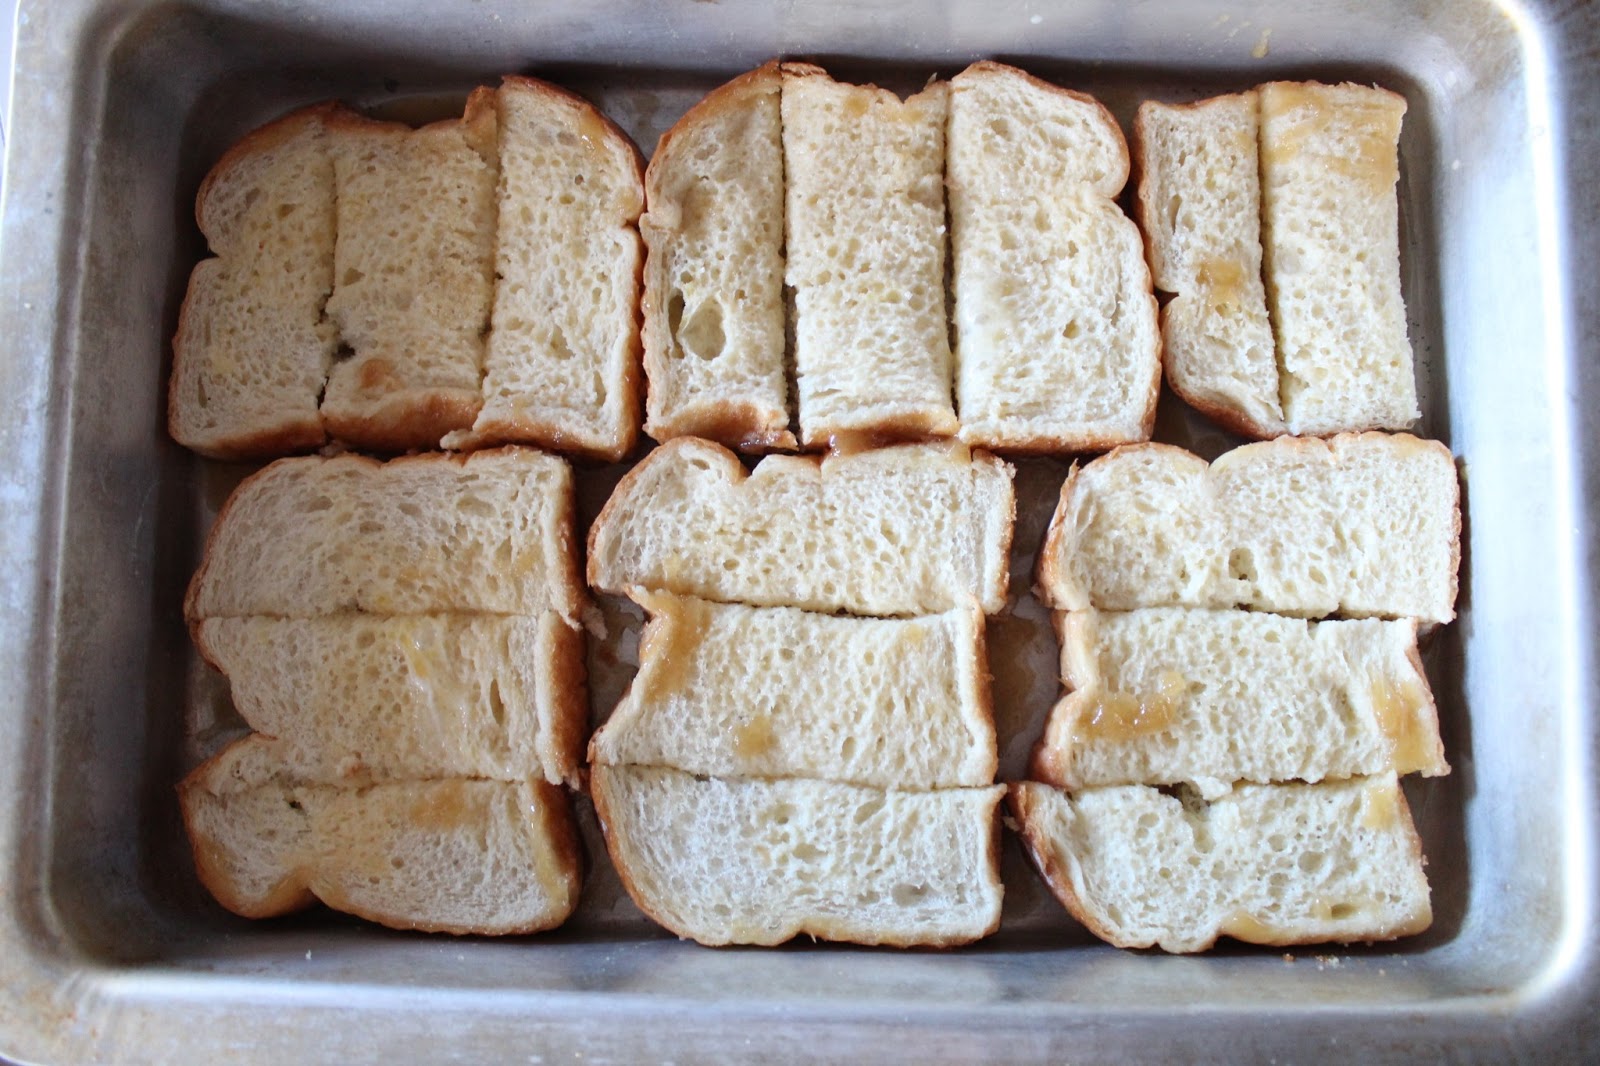
Lay your bread in your pan ..  I cut them in sections like french toast sticks

Spoon your egg mixture on top of the bread.

Let sit for 1/2 hour so the bread can absorb the mixture.

Bake at 350 for 45 min or until bread is golden brown .. 


sprinkle with powdered sugar if you'd like .. 


WALLLAAAA!!!


enjoy :)  


What I love about this is that all the french toast is done at once .. no standing at the stove forever flipping pieces and serving a few at a time .. pop em in the oven .. serve everyone at once .. eat .. enjoy

Verdict; LOVE this pin ... smells so good .. easy to make ..  I wouldn't say it really tasted like the french toast you make in a pan at all ... it is very sweet so taste before you add syrup .. I think the recipe would be perfect with some fresh fruit .. simmer strawberries with a bit of oj and sugar and make a nice warm fruit sauce .. 

Sunday, February 17, 2013

365 Days of Pinterest Day 15 ~ DIY GLITTER Magnets!

GLITTER GLITTER GLITTER!


Day 15 of my 365 Days of tenting out Pinterest Pins ...
"its no secret that I'm a big fan of glitter (and glitters cousin sequin" ... and that is the truth .. Iv been wanting to do this pin for a long time .. Glitter Magnets .. of course you can really do anything you want with the glitter stones when you are finished ... all you need is a glue gun and some imagination .. but lets stick to the task at hand ...


The original pin
http://pinterest.com/pin/267119821620604034/


What You Will Need
~ Clear flat back 'marbles'  The glass dome you can find at the craft store or dollar store.  Make sure they are clear, if the have an opal or pearl glaze they wont work.
Strong magnets ... they have to hold the weight of the glass dome
~ E6000 Glue .... the mother of all glues .. (from Walmart or Micheals)
~ GLITTER!!!  I used both the expensive and fabulous Martha Stewart Octagon Glitter (thank you Martha) and semi fine dollar store glitter ..
~A paint brush .. 
~Varnish (I used Folkart)
~Little Helpers ( I had all my nieces and nephews help .. it was a blast .. )


I set up all my gliter fabulousness in little bowls in a line .. I took one child at a time for the glitter dipping so things didnt get messy ..


Maddy!!


Maddy Moustached the glitter :)


put a dab of glue on the back of your glass dome .. spread it with a paint brush (3 mm thick)


dip your dome in glitter!  You can keep the colors solid or multi dip, get creative .. 


Mary :)


Lily 


Mom


let your glitter domes dry about 3 hours .. we put them on papers with each kids name .. 


when your glitter is dry seal the backs with a layer of varnish . 


Get a helper like my nephew Mikey!!!  He was awesome .. 


He even used a rag to help me wipe off any excess varnish that dripped to the front .. what a man!!!
Give the varnish another hour to dry .. if you need to speed er up use a blow dryer .. 

now take your E600 glue and attach your magnets .. I forget to photograph this step so bam!


more cute pics of my awesome family!

let that glue dry and WALAAAA!!!!


 Hello GLITTER FABULOUS NESS!!!!!


Verdict ... AWESOME!!  TIPS .. no glue gun .. it wont hold .. I found only E6000 worked and we used weak magnets at first that didn't hold either .. so get the good glue and the strong magnets .. 
I actually made a necklace out of one of my glass domes to .. Ill update this post tomorrow and show you .. we thought about using the dome and knobs on a dresser and gluing them to a picture frame .. 


UPDATE ~

Here is the fabulous necklace I made with my 'shimmer rock"  I purchased a few bezels from Etsy .. "Lace Edge Bezel Cups 35mm"  4 for $2.80.


I hung a cute star charm on it after the photo .. :)  magical


Sunday, February 3, 2013

365 Days of Pinterest Day 11 ~ Oreo Cappuccino Poke Pudding Cake.


Oreo Pudding Poke Cake  


The original pin seemed so enticing  ..  I have to be honest, I followed the recipe in the original pin and I did not like it at all ... I began this 365 Days of Pinterest to find out what pins I like and what pins didn't work .. so I would say YUCK to this pin ... it was pretty bland and the pudding made it seem slimy.  So I re made it my way and improved it a bit ... 

Here is the original pin


http://pinterest.com/pin/267119821620483457/


INGREDIENTS

~ Chocolate cake mix; **  The original pin called for a box cake mix, I made my first cake with a box mix and found it to be tasteless so Iv included my chocolate cake mix recipe on the bottom of this page .. its so chocolaty and good.  Its worth the extra time.
~ Crushed Oreos (I used 2 cups)
~Frosting; I used Betty Croker whipped 
~ Instant Pudding; 2 boxes.  The original recipe calls for Jello Oreo Pudding.  For my second cake I added instant coffee.
~ Instant coffee - 2 tbs ( I used Tim Hortons Instant Cappuccino) 
~ 1 cup confections sugar


Crush Your Oreos. I just used my fingers to break the oreos apart then laid them in a flat bowl and crushed them with a big spoon.


Bake your cake.  Use a super cute vintage bowl like my bird heart bowl ... tee hee


2 min before the cake is done make your pudding.  My tweaks
**Add 2 tbs of instant coffee mix to your pudding and blend well.  
** add one cup confectioners sugar
Let your pudding thicken a bit.  5 min should be fine.


poke your cake.  I used a wooden spoon end .. 


Pour in your pudding .. pour it into the holes and 'sweep' the execs pudding over the top and into the holes.


Let your cake set in the refrigerator for 1 hour.  Frost.


Add your crushed Oreos


As I said .. Yuck to the original recipe   

How to improve it. 

Make your cake from scratch
(if you want cappuccino flavor) add 2 tbs of instant coffee 
add 1 cup confectioners sugar to your pudding


Daisey's Chocolate Cake Mix (Daisey is my daughter .. shes the baker in our family)

1 1/3 cup all purpose Flour
2/3 cups unsweetened cocoa
1 1/2 teaspoon baking powder
1/2 teaspoon baking Soda
1.2 teaspoon Salt
1 cup whole milk
1 1/2 teaspoons Vanilla extract
1 1/2 cups sugar
10 tablespoons butter
2 large eggs

1. Preheat oven at 350 F

2.  combine flour, cocoa, baking powder, and salt.  In a 2 cup liquid measure, mix milk and vanilla and set aside

3. In a large bowl beat sugar and butter just until blended.  Use your mixer on high.  beat 3 min until it is light and creamy.  Reduce speed to low and add eggs, one at a time.

4.  Add flour mixture alternately with milk mixture.  

5.  Cook 22 - 25 min


Verdict... The cake is MUCH better made from scratch instead of the box mix .. but even then I wont be making the cake again .. try it if you'd like .. if you have any other tweaks to improve the recipe please let me know .. I really wanted this to be Yum :)